T3100 | T3100e | T3100SX | T3200 | T3200SX | T3200SXC | T5200 | T5200C
Replacement BIOS ROM chips for Toshiba T3200SX
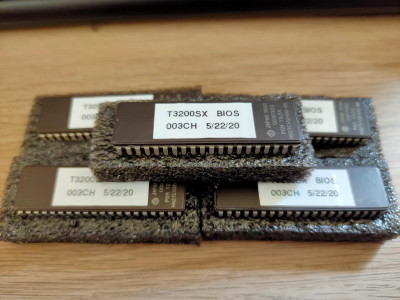
 I have started selling replacement 003CH BIOS ROM chips for the T3200SX. If you find yourself in a situation where your BIOS won't detect a replaced hard drive because it is not the original Conner drive shipped with the unit, you can use my BIOS chip to get around any limitations you may have with your current BIOS. The BIOS ROM contains both a BIOS and a VGA BIOS: The one I am selling is denoted as version 003CH Hybrid BIOS, which means it is a combination of the 003C BIOS from my original machine that accepts any HDD, and also has the latest VGA BIOS from the ROM chip 003I which is faster than that from the original 003C chip. The hybrid BIOS has an older version of the BIOS which doesn't validate the hard drive, and will allow you to install and boot any hard disk. With this BIOS, all you need is a disk overlay program (AnyDrive, see files section) to correct the hard drive parameters. This BIOS chip is a drop-in replacement for the old BIOS chip, will not affect it's stock appearance and should work great in any T3200SX system.
Pricing
Parts and labor is $40.00 + shipping. Shipping within contiguous United States is $10.00. For Alaska, and US territories, shipping is $20.00. Shipping outside United States is a bit costly, but remains an option if you would like to go that route. For example, shipping to France costs $35.00. Payment must be done through PayPal.
Buying
To buy, please visit my contact information page for up-to-date contact information. Send an email with your request, address and I will send you a quote. If you do not hear from me, my responses may be trapped in a spam filter. In that case, you may also contact me through Facebook. I take payments through PayPal.
How to change the T3200SX BIOS chip
You will need to remove the keyboard to access the BIOS chip underneath.
- Close the screen lid.
- Locate and remove four screws from the bottom front side (user facing side) of the unit.
- Open the screen lid, and slowly remove the keyboard. Pull the keyboard up, by first loosening up the corners. Be careful when doing this, there is a ribbon cable under the keyboard connecting the keyboard to the motherboard.
- You will not be able to detach the keyboard ribbon cable from the motherboard yet, because the ESD shield is in the way. You will first need to remove the ESD shield from under the keyboard to access the area where the keyboard ribbon cable detaches from the motherboard. The ESD shield is usually held in place by two screws at the rear corners of the shield.
- Once the shield is removed, you may pull the tab on the ribbon cable connector, and pull the ribbon cable out. If the tab was opened correctly, you will feel zero resistance when pulling out the ribbon cable.
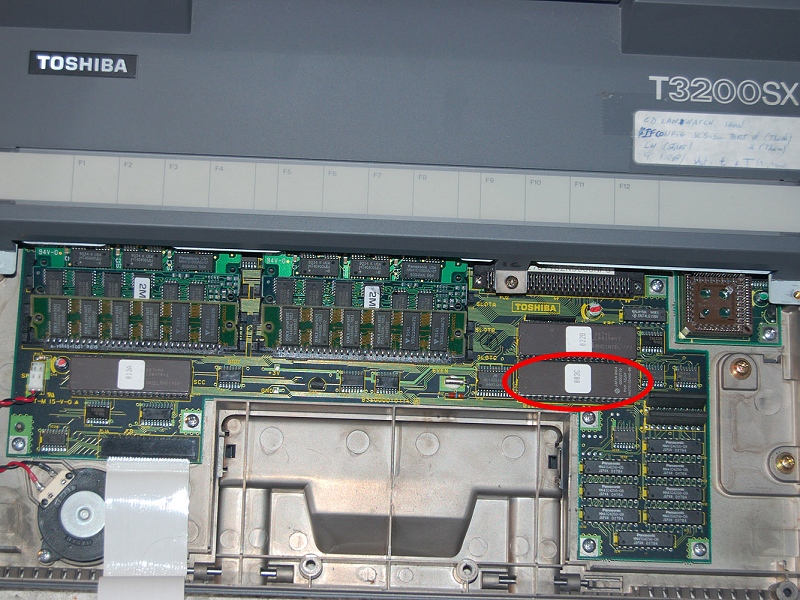
- You now have access to the Motherboard and RAM area. The BIOS chip is on the lower right corner and will be labeled 003x, where x is the version of the BIOS. Carefully remove the BIOS chip from it's socket using a chip puller. Note the notch on the left indicating the orientation of the BIOS chip. There is a matching notch silk screened on the motherboard.
- Place the new chip in the socket, with the notch on the ROM chip pointing toward the left hand side of the computer. Be sure to check that all pins line up in the socket, then push firmly to secure the chip inside the socket.
